Web-App
Karamel provides a web-based UI and is a lightweight standalone application that runs on user machines, typically desktops. The user interface it has three different perspectives: board, terminal and experiment designer.
Board-UI
The Board is the landing page that appears in your browswer when you start Karamel. The Board is a view on a cluster definition file that you load. You can modify the cluster using the UI (adding/removing recipes, entering parameter values, save updated cluster definitions) and run the cluster definition from the UI. This way, inexperienced users can launch clusters without needing to read cluster definitions in YAML.
Load Cluster Definition
Click on the menu item, and then click on Load Cluster Defn:
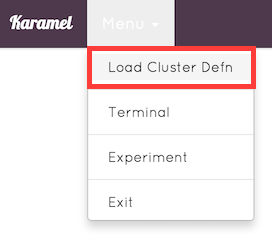
Load Cluster Definition.
Lists are shown in the board perspective of the UI, where each list represents a group of machines that install the same application stack. At the top of each list you see the group-name followed by the number of machines in that group (in parentheses). Each list consists of a set of cards, where each card represents a service (Chef recipe) that will be installed on all the machines in that group. Chef recipes are programs written in Ruby that contain instructions for how to install and configure a piece of software or run an experiment.

Lists of cards in Karamel. Each card is a Chef recipe.
Change group name and size
To change the GroupName and/or number of machines in each group, double click on the header of the group. In the following dialog, you can make your changes and submit them (to indicate your are finished).
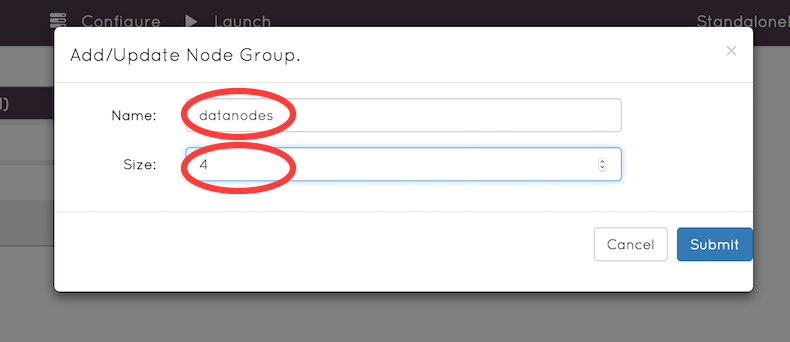
Changing the number of nodes in a NodeGroup
Add a new recipe to a group
In the top-left icon in the header of each group, there is a menu to update the group. Select the Add recipe menu item:
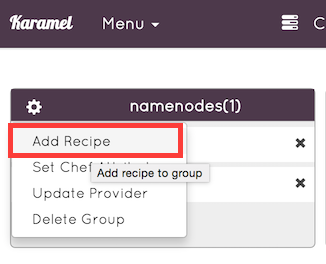
Adding a Chef recipe to a node group.
In order to add a recipe to a group, you must enter the GitHub URL for the (karamelized) Chef cookbook where your recipe resides, and then press fetch to load available recipes from the cookbook. Choose your recipe from the combo-box below:
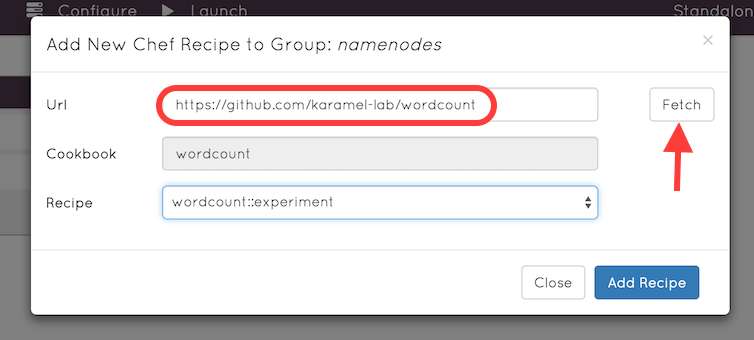
Adding a Chef recipe from a GitHub cookbook to a node group.
Customize Chef attributes for a group
Parameters (Chef attributes) can be entered within the scope of a NodeGroup: group scope values have higher precedence than (override) global cluster scope values. To update chef attributes for a group, select its menu item from the group settings menu:
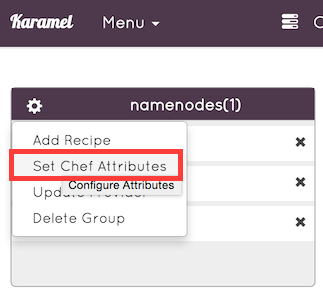
Updating Chef Attributes at the Group level.
In the dialog below, there is a tab per used cookbook in that group, in each tab you see all customizable attributes, some of them are mandatory and some optional with some default values. Users must set a value for all of the mandatory attributes (or accept the default value, if one is given).
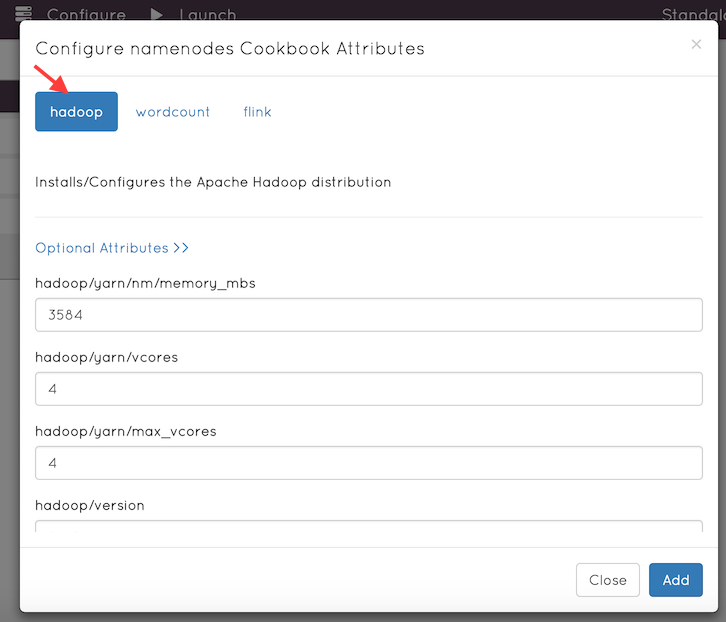
Entering attribute values to customize service.
Customize cloud provider for a group
Cluster definition files support the use of multiple (different) cloud providers within the same cluster definition. Each group can specify its own cloud provider. This way, we can support multi-cloud deployments. Like attributes, cloud provider settings at the NodeGroup scope will override cloud provider settings at the global scope. Should you have multi-cloud settings in in your cluster, at launch time you must supply credentials for each cloud separately in the launch dialog.
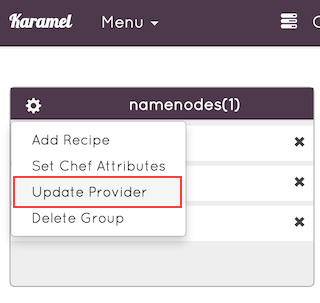
Multi-cloud deployments are supported by specifying different cloud providers for different node groups.
Choose the cloud provider for the current group then you will see moe detailed settings for the cloud provider.
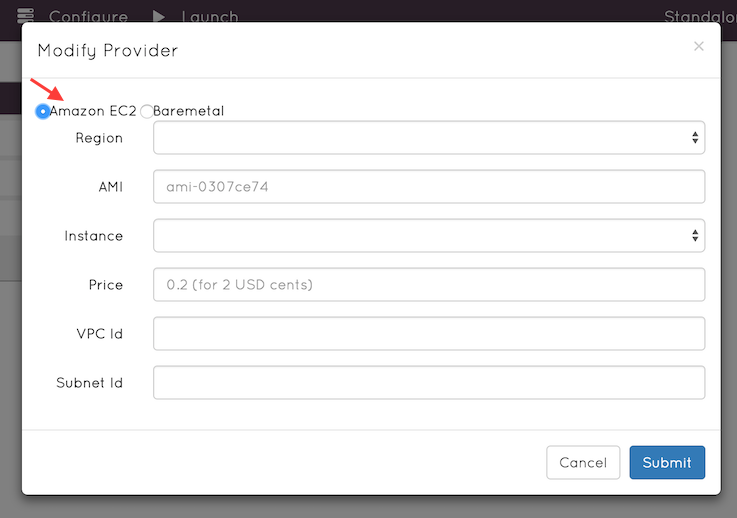
Configuring a cloud provider per Node Group.
Delete a group
If you want to delete a group find the menu-item in the group menu.

Delete a Node Group.
Once you delete a group the list and all the settings related to that group will be disappeared forever.

Delete Confirmation.
Update cluster-scope attributes
When you are done with your group settings you can have some global values for Chef attributes. By choosing Configure button in the middle of the top bar a configuration dialog will pop up, there you see several tabs each named after one used chef-cookbook in the cluster definition. Those attributes are pre-built by cookbook designers for run-time customization. There are two types of attributes mandatory and optional - most of them usually have a default value but if they don’t, the user must fill in mandatory values to be able to proceed.

To fill in optional and mandatory attributes.
By default each cookbook has a parameter for the operating system’s user-name and group-name. It is recommended to set the same user and group for all cookbooks that you don’t face with permission issues.
It is also important to fine-tune your systems with the right parameters, for instance according to type of the machines in your cluster you should allocate enough memory to each system.
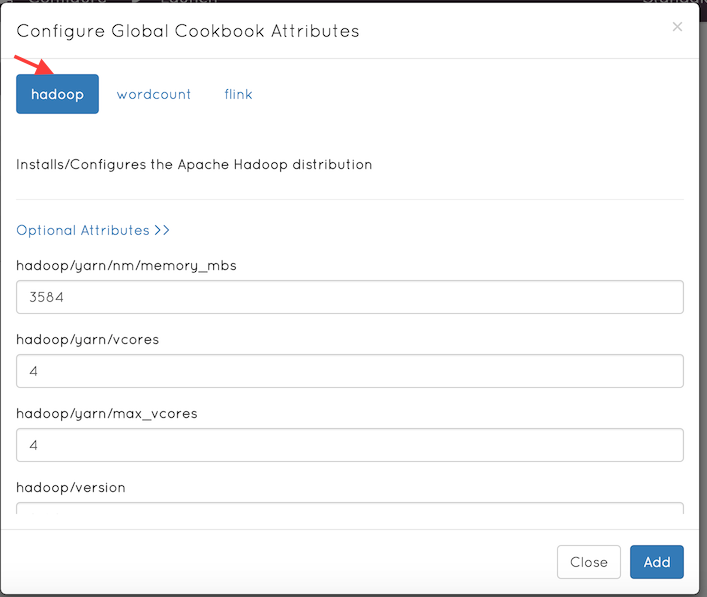
Filling in optional and mandatory attributes.
Start to Launch Cluster
Finally you have to launch your cluster by pressing launch icon in the top bar. There exist a few tabs that user must go through all of them, you might have to specify values and confirm everything. Even though Karamel caches those values, you have to always confirm that Karamel is allowed to use those values for running your cluster.

Launch Button.
Set SSH Keys
In this step first you need to specify your ssh key pair - Karamel uses that to establish a secure connection to virtual machines. For Linux and Mac operating systems, Karamel finds the default ssh key pair in your operating system and will use it.
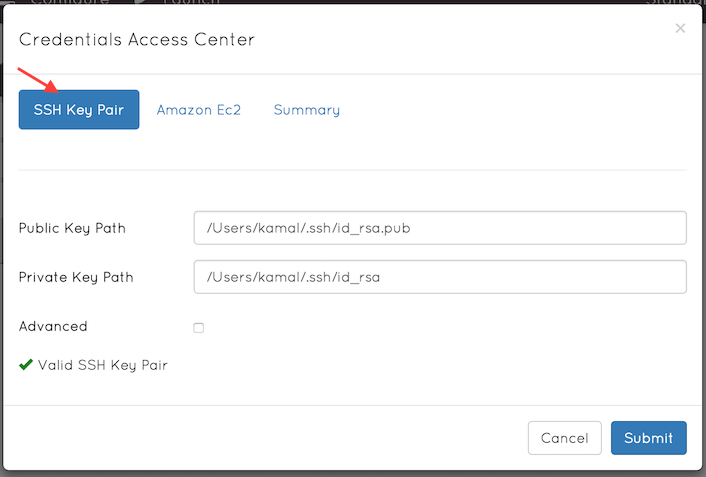
SSH key paths.
Generate SSH Key
If you want to change the default ssh-key you can just check the advance box and from there ask Karamel to generate a new key pair for you.
Password Protected SSH Keys
If your ssh key is password-protected you need to enter your password in the provided box, and also in case you use bare-metal (karamel doesn’t fork machines from cloud) you have to give sudo-account access to your machines.
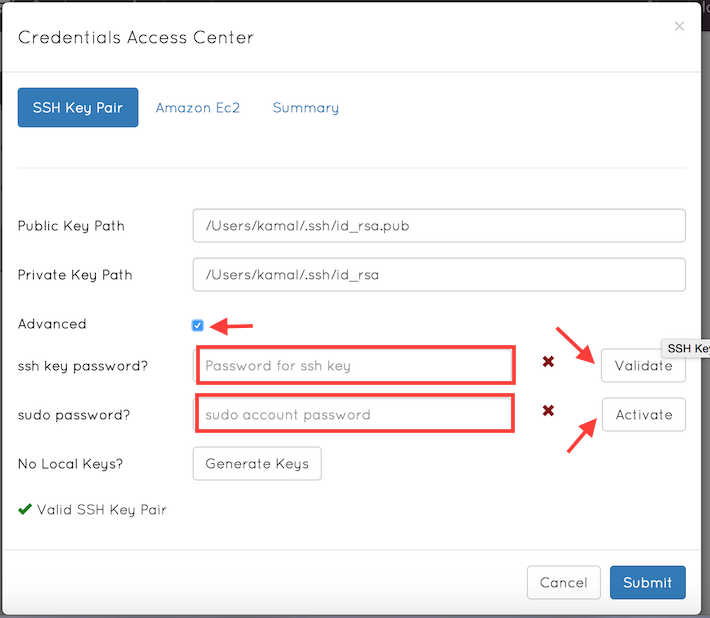
Advanced options for SSH keys.
Cloud Provider Credentials
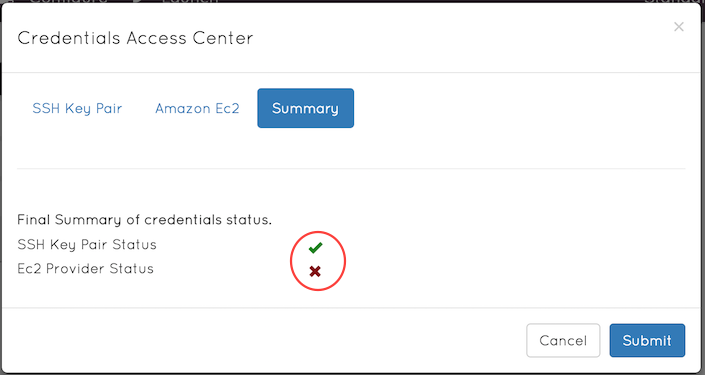
In the second step of launch you need to give credentials for accessing the cloud of your choice. If your cluster is running on a single cloud a tab related to that cloud will appear in the launch dialog and if you use multi-cloud a separate tab for each cloud will appear. Credentials are usually in different formats for each cloud, for more detail information please find it in the related cloud section.
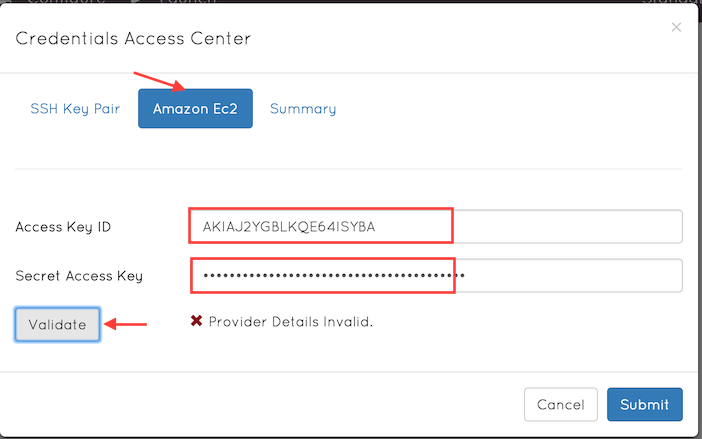
Provider-specific credentials.
Karamel Terminal
The terminal perspective enables user to monitor and manage running clusters as well as debugging Chef recipes by running them.
Open Terminal
The Board-UI redirects to the terminal as soon as a cluster launches. Another way to access the terminal is by clicking on the terminal menu-item from the menu dropdown list, as shown in the screen-shot below.
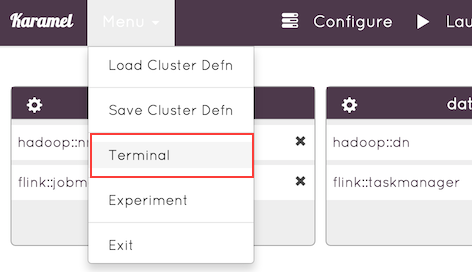
Selecting the terminal perspective.
Button Bar
The Terminal has a menu bar in which the available menu items (buttons) change dynamically based on the active page.
Command Bar
Under the menu bar, there is a long text area where you can execute commands directly. The buttons (menu items) are, in fact, just widely used commands. To see list of commands click on the Help button.
Main Page
The main page in the terminal shows available running clusters - you can run multiple clusters at the same time they just need to have different names - where you see general status of your cluster. There are some actions in front of each cluster where you can obtain more detail information about each cluster.
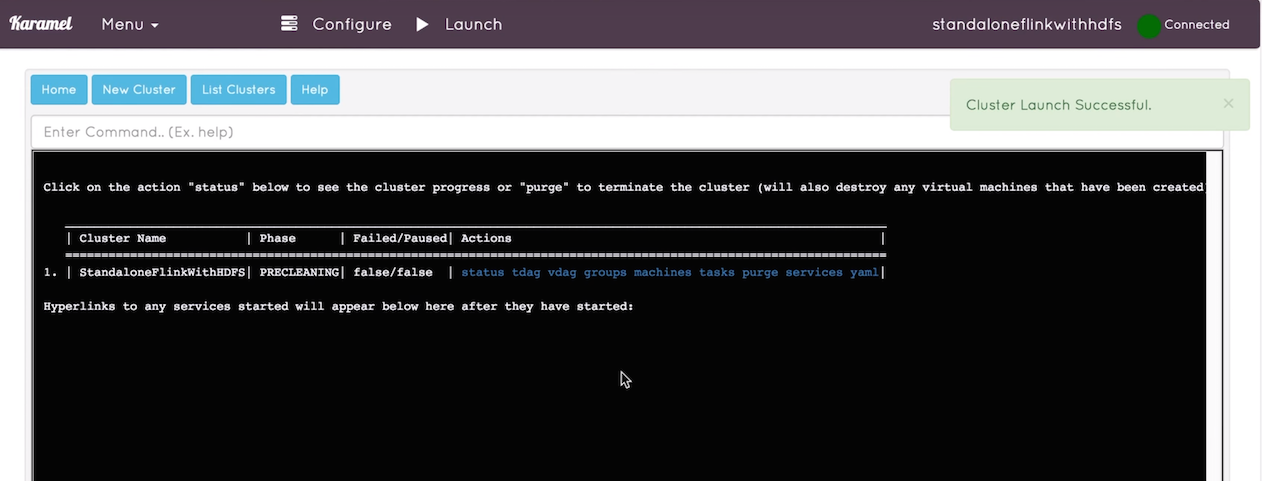
Successful launch redirects to terminal page.
Cluster Status
Status page pushes the new status for the chosen cluster very often. In the first table you see phases of the cluster and each of them they passed successfully or not.
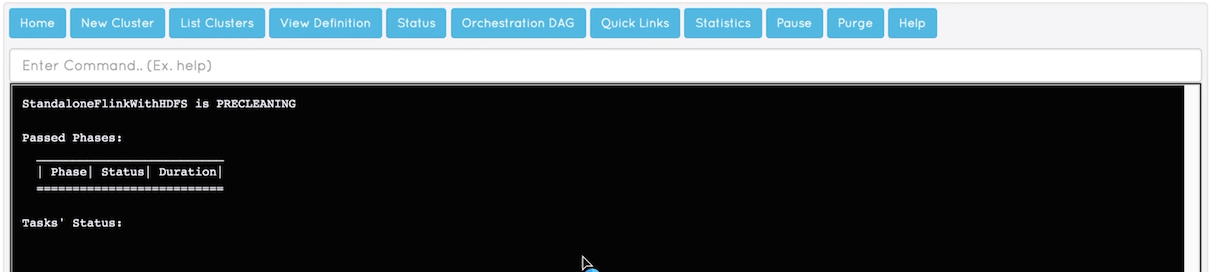
Cluster Status - A recently started cluster
- The cluster deployment phases are:
- #1. Pre-Cleaning #2. Forking Groups #3. Forking Machines #4. Installing
As soon as the cluster passes the forking groups phase, a list of machine tables appear under the phases table. Each machine table indicates that the virtual machine (VM) has been forked and some details on the VM are available, such as its IP Addresses (public and private) and its connection status.
Inside each machine table there exists a smaller table for showing the tasks that are going to be submitted into that machine. Before all machines became forked and ready, all task tables are empty for all machines.

Cluster Status - Forking Machines
Once all machines have started forking tasks, a list of tasks are displayed for each machine. The Karamel Scheduler orders tasks and decides when each task is ready to be run. The scheduler assigns a status label to each task.
- The task status labels are:
- Waiting: the task is still waiting until its dependencies have finished;
- Ready: the task is ready to be run but the associated machine has not yet taken it yet because it is running another task;
- Ongoing: the task is currently running on the machine;
- Succeed: the task has finished successfully;
- Failed: the task has failed - each failure will be propagated up into cluster and will cause the cluster to pause the installation.
When a task is finished a link to its log content will be displayed in the third column of task table. The log is the merged content of the standard output and standard error streams.
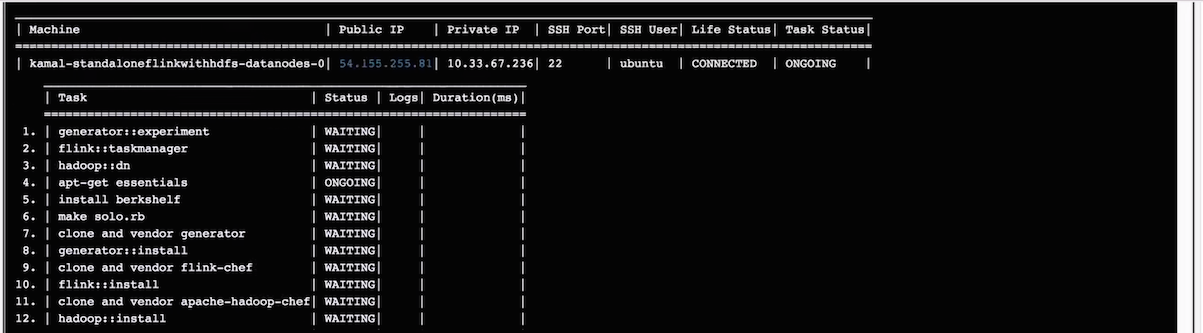
Cluster Status - Installing.
Orchestartion DAG
The scheduler in Karamel builds a Directed Acyclic Graph (DAG) from the set of tasks in the cluster. In the terminal perspective, the progress of the DAG execution can be visualized by clicking on the “Orchestration DAG” button.
Each Node of the DAG represents a task that must be run on a certain machine. Nodes dynamically change their color according to the status change of their tasks. Each color is interpreted as follows:
- Blue: Waiting
- Ready: Yellow
- Ongoing: Blinking orange
- Succeed: Green
- Failed: Red
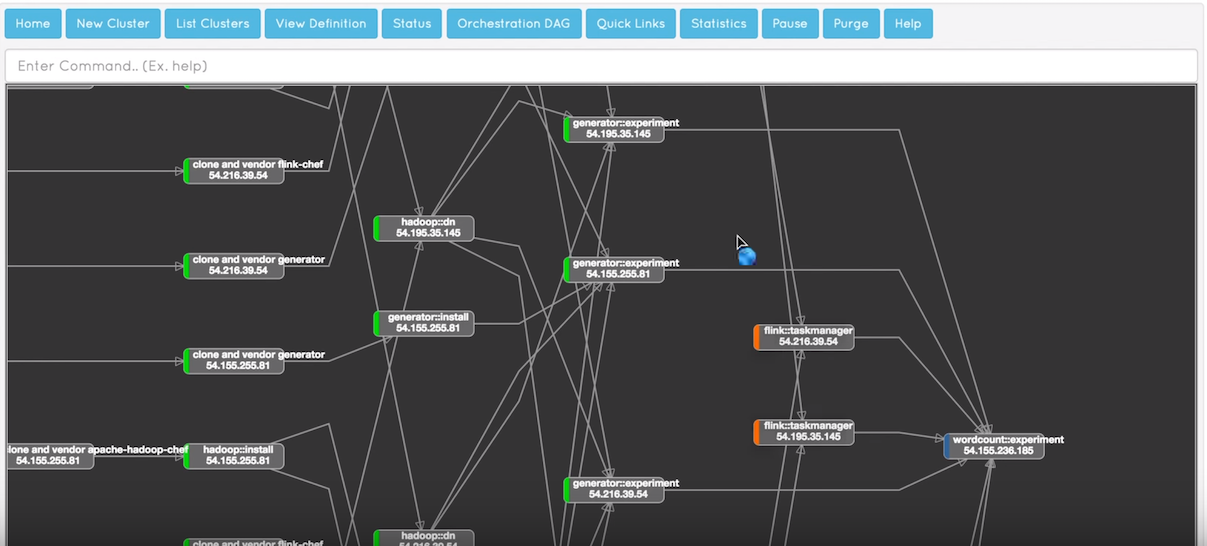
Orchestration DAG
The Orchestration DAG is not only useful to visualize the cluster progress but can also help in debugging the level of parallelization in the installation graph. If some tasks are acting as global barriers during installation, they can be quickly identified by inspecting the DAG and seeing the nodes with lots of incoming edges and some outgoing edges. As have local orchestration rules in their Karamelfiles, the DAG is built from the set of Karamelfiles. It is not easy to manually traverse the DAG, given a set of Karamelfiles, but the visual DAG enables easier inspection of the global order of installation of tasks.
Quick Links
Quick links a facility that Karamel provides in the terminal perspective to access web pages for services in your cluster. For example, when you install Apache Hadoop, you might want to access the NameNode or ResourceManager’s web UI. Those links must be designed in karamelized cookbooks (in the metadata.rb file). Karamel parses the metadata.rb files, extracting the webpage links and displaying them in the Quick Links tab.
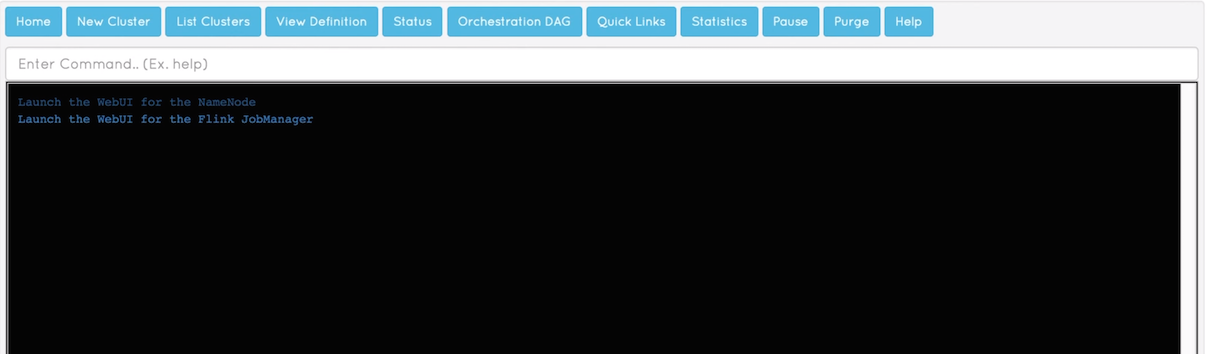
Quick Links
Statistics
Currently Karamel collects information about the duration of all tasks when you deploy a cluster. Duration statistics are available by clicking on statistics button that will show the names of the tasks and their execution time. It might be have you have several instances of each task in your cluster, for example, you may install the hadoop::dn recipe on several machines in your cluster - all such instances will appear in the statistics table. Statistics is a good way for performance measurement for some type of experiments. You can just draw a plot on them to show the performance of your experiment.
Pause/Resume
A cluster may pause running either because the user’s order or when a failure happens. It is a good way if user wants to change something or if he wants to avoid running the entire cluster for some reason. In that case when you click on the “Pause” button it takes some time until all machines finish their current running task and go into the paused mode. When cluster is paused, a resume button will appear which proceeds running the cluster again.
Terminate
Terminate is a button to destroy and release all the resources both on Clouds and Karamel-runtime, destroying any virtual machines created. It is recommended to use the terminate function via Karamel to clean-up resources rather than doing so manually - Karamel makes sure all ssh connections, local threads, virtual machines and security groups are released completely.
Experiment Designer
The experiment Designer perspective in Karamel helps you to design your experiment in a bash script or a python program without needing to know Chef or Git. Take the following steps to design and deploy your experiment.
Find experiment designer
When you have Karamel web app up and running, you can access the experiment designer from the Experiment menu-item on the left-hand side of the application.
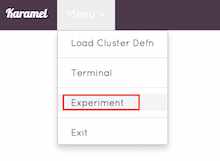
Get into the experiment designer.
Login into Github
Github is Karamel’s artifact server, here you will have to login into your Github account for the first time while Karamel will remember your credentials for other times.
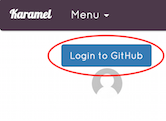
Login button.
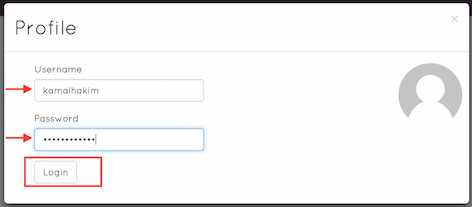
Github credentials.
Start working on experiment
You can either create a new experiment or alternatively load the already designed experiment into the designer.

Work on a new or old experiment.
Create a new experiment
If you choose to create a new experiment you will need to choose a name for it, optionally describe it and choose which Github repo you want to host your experiment in. As you can see in the below image Karamel connects and fetches your available repos from Github.
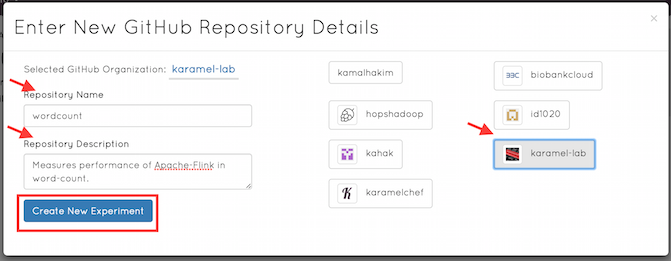
New experiment on a Github repo.
Write body of experiment
At this point you land into the programming section of your experiment. The default name for the experiment recipe is “experiment”. In the large text-area, as can be seen in the screenshot below, you can write your experiment code either in bash or python. Karamel will automatically wrap your code into a chef recipe. All parameters in experiment come in the format of Chef variables, you should wrap them inside #{} and prefix them node.<cookbookname>. By default, they have the format #{node.cookbook.paramName}, where paramName is the name of your parameter. If you write results of your experiment in a file called /tmp/wordcout__experiment.out - if your cookbook called “wordcount” and your recipe called “experiment”- Karamel will download that file and will put it into ~/.karamel/results/ folder of your client machine.
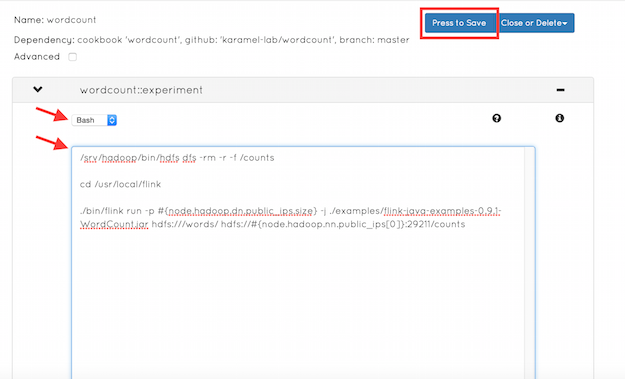
Experiment bash script.
Define orchestration rules for experiment
Placing your experiment in the right order in the cluster orchestration is a very essential part of your experiment design. Click the advanced checkbox, write in the line-separated Cookbook::recipe_name that your experiment requires have finished before the experiment will start. If your experiment is dependent on other cookbooks (for recipes or parameters), you must enter the relative GitHub name for the cookbook and the version/branch in line-separated format in the second text-area.
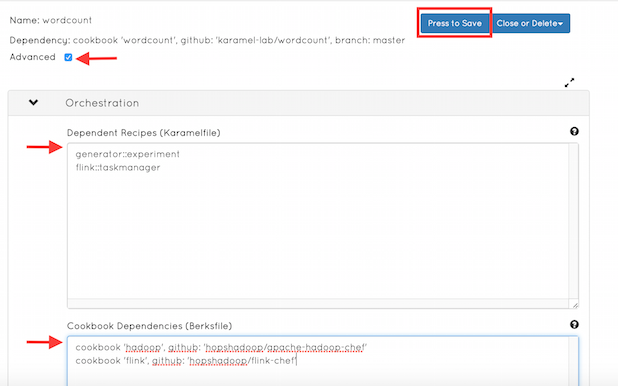
Orchestration rules for new cluster.
Push your experiment into Github
You can save your cluster to GitHub by pressing the save button in the top-right hand corner of the webpage. This will generate your cookbook and copy all the files to Github by adding, committing, and pushing the new files to GitHub.
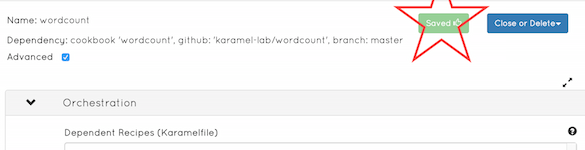
Push the experiment to a Github repository.
Approve uploaded experiment to Github
Navigate to your Github repo on your web browser and you can see your cookbook.
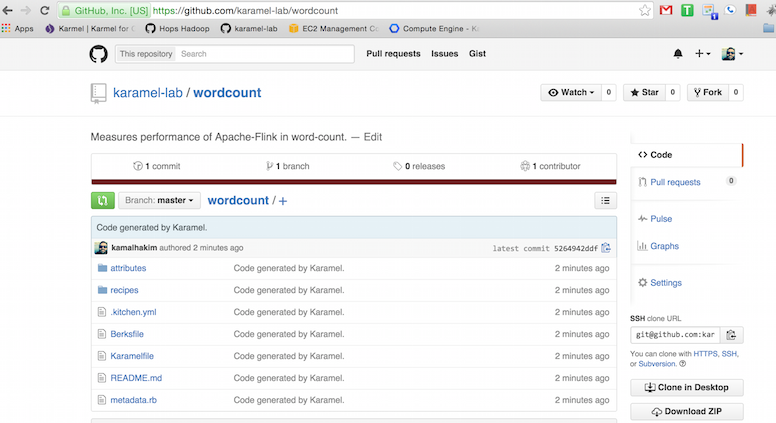
New experiment added to Github.